Frequently Asked Question
Using and embossing with Tiger Software Suite from Microsoft Excel.
Last Updated 11 years ago
Operation of the Tiger Formatter in Microsoft Excel differs somewhat from operation in MS Word. In Excel, the Quick Emboss option is not available. Because of the nature of Excel spreadsheets, the Translation Mode selection is unnecessary and does not show in the Tiger menu.
Also absent from the Tiger menu in Excel is the Reload Original Document option. This option is unnecessary in Excel because the original sheet in the spreadsheet is not changed when the Formatter is run.
Furthermore, the VoicEye features are not implemented here.
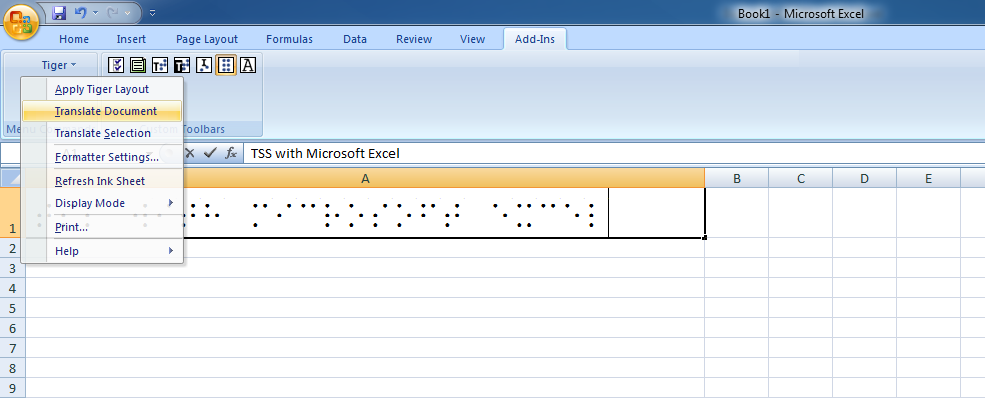
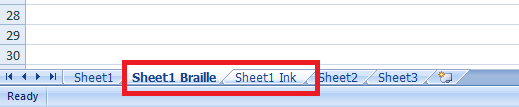
To translate your Excel sheet, navigate to Add-ins -> Tiger -> Translate Document at the top of the window. You will notice that two additional sheets are created after translation called Sheet 1 Braille and Sheet 1 Ink.
How to emboss from Excel:
If your embosser is capable of ink output:
Also absent from the Tiger menu in Excel is the Reload Original Document option. This option is unnecessary in Excel because the original sheet in the spreadsheet is not changed when the Formatter is run.
Furthermore, the VoicEye features are not implemented here.
To translate your Excel sheet, navigate to Add-ins -> Tiger -> Translate Document at the top of the window. You will notice that two additional sheets are created after translation called Sheet 1 Braille and Sheet 1 Ink.
How to emboss from Excel:
If your embosser is capable of ink output:
1. Select Sheet 1 Braille.
2. Additionally select Sheet 1 Ink by pressing Shift + Page Down or by using the mouse by holding Shift and then click Sheet 1 Ink at the bottom of the window.
3. Go to File -> Print.
4. Select your embosser in the printer drop down box and go to Properties.
5. Navigate to the Tiger tab and select 2 In 1, then click OK.
6. Click OK to print your Excel sheet.
If your embosser is NOT capable of ink output:4. Select your embosser in the printer drop down box and go to Properties.
5. Navigate to the Tiger tab and select 2 In 1, then click OK.
6. Click OK to print your Excel sheet.
1. Select Sheet 1 Braille.
2. Go to File -> Print.
3. Click OK to print your Excel sheet.
2. Go to File -> Print.
3. Click OK to print your Excel sheet.